Catching rain drops

It’s a cold, rainy night as I sit here listening to the dog snore, the cat playing with my hair, and watching Water for Elephants.  Fitting weather to think about ways to conserve what’s falling from the sky.

The water bill comes quarterly and over the last five years it has increased a bit.  The most recent one again showed an increase in water usage over the same time period last year.  What can we do to conserve?  Let’s take a look.

20130603_182424

Inside, we already have two low-flow shower heads (one compliments of our recent Energy Audit).  Low-flow these days means having a flow rate of no more than 2.5 gallons per minute.  Prior to 1992 legislation, some showers had a flow rate double the new ones.  The toilet in the new bathroom also has a low flow design, with no more than 1.6 gallons flushed at a time.  Our older bathroom’s toilet doesn’t fare as well.  When the fill valve inside the toilet broke, we replaced it not only with a newer eco-friendly version (BlueSource HydroClean Water saving fill valve) but also replaced the flush handle with a dual flush version.  My family initially thought I was crazy, but they’ve since come around.

Also compliments of the Energy Audit was a new kitchen faucet aerator.  Aerators determine how much water will flow from your faucet, so having a water conserving type will ultimately save water and money.  I’ll be honest, at first I didn’t like the change.  Washing dishes by hand, the lower water pressure felt “funny”.  I had every intention of putting the old aerator back on, but never got around to it.  Now, I’ve adapted.  At least until the (future) new dishwasher!

Outside, I’ve got all kinds of buckets and barrels to collect rain.

100_1540

The rain barrel on the deck is a stand-alone for now.  In the near future we will rig it up so that one of the gutters empties into it.  We created it from an idea off the internet, cutting a hole into the top of a garbage can and stretching landscaping fabric under the lid to catch any dirt and bugs.  The spigot was installed into a drilled hole and tightened with a rubber seal.

100_1539

We plan on using the same idea on the water bucket for the chicken waterer system.

Here’s to hoping the next water bill is lower!

The Compostables

A few years back we decided to extend our raised bed garden and had a load of loam delivered.  Honestly, I wasn’t entirely thrilled with it, being full of rocks and “dirty” (honey’s description).  It seemed to be more like a load of junk dirt and not the nutrient rich top soil we were hoping for.  We got it for a cheap price, so who can complain.  Three years later and the raised beds are looking pretty good.  Nice and fertile, loose, loamy…I’m happy with how they have improved.

I bought a test kit this year to check for nutrient depletion in the lawn, gardens, and where ever less I thought needed it (okay, I admit I wanted to play scientist!).  The lawn needed more nitrogen, so we picked up some organic fertilizer.  A week later, I tested the garden.  I was expecting to have to do some major amendments to the garden, being that it didn’t have a good start and I slacked off in fertilizing it last year.  I was in shock when I read the results….all components were within the normal range.  That included pH, nitrogen, phosphorous, and potassium.  All I can say is…that compost brewing in the back of the yard is AMAZING!

100_1535

I’ve been composting for a long time and find that my current set up works best for me.  In the past, I threw everything (leaves, grass clipping, produce clippings) into a very large (10 by 12 foot) pile and turned it every few weeks.  It was labor intense to turn the pile as it grew in size and ultimately the turning drifted to every few months.  A couple of years ago, I dismantled the large pile, took the wire fencing surrounding it, and made several smaller circular piles.  Each pile now is about three to four feet wide or smaller and about three feet high.  I turn them more frequently in the spring and early summer when I have the most access to grass clipping available.

Composting correctly is like making a good ice box cake.  20130517_192243Poured in layers, the chocolate and vanilla pudding are separated by just the right amount of graham cracker crumbs and allowed to set in the frig long enough to cut perfectly.  The ingredients for the compost pile should be in the right amounts as well.  The main compost ingredients are carbon-rich sources (“brown”), nitrogen-rich sources (“green”), water, turning, and time.  Carbon sources  include: dried fall leaves, corn stalks, shredded paper, paper towel tubes, shavings, sawdust, cardboard.  Nitrogen sources include: fresh grass clippings, vegetable and fruit waste, weeds (some say not if they’ve gone to seed), manure (not dog, cat or us), garden plants at the end of the season.  The right ratio depends on what you are adding to the pile.  The carbon-to-nitrogen ratio on the Grow it Organically website includes lots more ingredients and the ratio needed for your pile.

In the fall, I save all the leaves in the compost fence rings or just along the back fence.  I let them sit all winter until I need them come spring.  Once the lawn starts getting mowed in the spring, I start my layering process.  I layer into each ring about 6 inches of leaves, then add about two inches of fresh mowed lawn clippings.  The only additive I apply to my lawn is organic fertilizer when needed, so I know that my compost won’t have any extra chemicals added.  Occasionally, my brown layers have included shavings from past caged pets and our current chickens.  The chicken shavings have the added manure mixed in…so it’s carbon with a kick!  I turn them every couple of weeks, usually letting nature keep them damp.  During dry spells, I do hose down the piles so that the decomposition process will continue.  Once a pile has reached the top of the fence, I stop adding to it and let it “cure”.  I repeat with a new compost pile and continue on throughout the season.  Come fall, usually at least one or two piles are done enough to be spread on the garden beds for the winter.  The other piles are left to winter over and come spring are ready to be added to the garden, spread around the raspberries and grapes, or anywhere else needed in the yard.

I used to add kitchen scraps (mainly fruit and vegetable waste, coffee grounds, tea bags, old bread) to the piles.  Last year, I finally purchased my first compost tumbler which is now home to all kitchen garbage.  VLUU L200  / Samsung L200To keep the brown/green ratio consistent, I do add in shredded paper, shavings, and some leaves from time to time.  I hose it occasionally to keep it moist and spin the tumbler every time I add ingredients.  I bought my tumbler from Amazon for about $100 and love it.  I found it fairly easy to put together and so far has been pretty sturdy, especially since I’ve dragged it to three different places since I’ve had it.  It has two different compartments, one for adding materials the other for curing.  The added bonus of using kitchen scraps is having less in the garbage pail to haul out to the curb!

100_1534 100_1533

Our new additions LOVE the compost piles and have started scratching through them!

100_1622

Next up I will be trying my luck with vermiculture.  Should be interesting to work with worms!

Doing with less (energy, that is)

100_1631

I’m always looking for ways to save money.  My latest obsession is trying to find ways to cut my energy costs, not only to save money but to use less fossil fuels.  According to David Gershon, Green Living Handbook, we waste up to 75 percent energy.  In an attempt to get a lower UI bill, I’ve been trying to incorporate some of his suggestions, as well as some of my own.

I started off my endeavor a couple of months ago by buying drying racks for my laundry.  100_1625I figured that the dryer uses up a good chunk of the electricity in the house, so cutting back on drying may help lower my bill a bit.  The racks are easy enough to use and hold a couple of loads of laundry at a time.  I don’t particularly like the “crunchy” feel of my laundry so I use a homemade fabric softener and only hang my laundry until it is almost dry, then put it in the dryer for about 15 minutes to finish off and soften up.  Compared to the 45 minutes or so needed for my laundry to dry, I’m ahead of the game.  Only major issue….getting the rest of the family to use the racks.  Sometimes my daughter will hang certain items, but usually they all use the dryer.  I find myself hanging their clothes out of the washer every once in a while.  I would do more, but I gave up doing their laundry a few years ago when I had so many loads in one weekend I could have sworn I had extra kids hidden in the house somewhere!

Moving into other areas, I considered the vampire watts of the electronics we have.  We have two televisions in the house with associated entertainment boxes sucking up wattage as they sit in standby.  So I plugged each component (TV, DVD, gaming consoles) into a surge protector to be turned off when not in use (cable box stays on separately all the time because of the DVR).  I showed the family the new set up and must admit, they do occasionally shut off the surge protector (not all the time, but….).

Lights are a tough one to keep up with.  We all are guilty of leaving on lights.  Even as I type this, I see the kitchen lights left on (thank you, honey, for shutting them off!).  Gotta keep thinking about that lower electric bill….

With the above strategies, I noticed a $15 drop from February to March.  Considering that the furnace was still running during this time AND the chicks heat lamp was burning for about two weeks, I’ll graciously accept the success!

20130419_142311

Blower door test

Continuing on, I scheduled an energy audit.  The cost was $99 and they spent about 2 1/2 hours in my home, conducting a blower door test, replacing shower heads and faucet aerators, installing (up to 40, if needed) compact fluorescent bulbs, sealing some areas of potential  leakage, identifying older appliances and making recommendations, and offering rebates for newer appliances.  When they were finished, I was given a summary of the visit.  According to the summary, my estimated annual energy costs (electricity and oil) was $3800.  After the visit, I should expect a $200 improvement.  If I took their recommendations into account, my savings would be a total of $700/year. The breakdown of recommendations included replacing the dehumidifier, refrigerator, and washer; applying more insulation in the attic; and installing new heating and central cooling systems.  Each item came with a payback in years (the cooling system with 156 year payback was definitely out!).  Rebates were offered for replacing the older appliances within four months of the energy audit with an ENERGY STAR equivalent (a new frig is tempting!)  The handbook they gave at the end of the visit also contained 101+ ways to cut energy costs.  Ideas included ENERGY STAR purchases, turning off the water heater when away, and clever placement of fans and lights.  The technicians that did the work were very professional and knowledgeable, showed up on time, and went over the booklet they left with me thoroughly.

Next up are the computers.  We have a desktop but seldom use it.  I put it on a surge protector as well and keep if off.  The laptops all have power down options as does the printer.  The best way I found to minimize laptop usage is to stack a few books in front of the kids!  With summer coming, we’ll be making lots of library runs.

After all the additional strategies, I found my electricity from March to April went up a little.  Disappointed, I attributed some of it to 24 hour/day heat lamp for the chicks for the entire month and power tools in use for the coop building.  With that behind us, I’m hoping again to see a drop in the next bill.

With summer coming, I know the air conditioning will be in use.  I had the unit serviced last year and keep up with the filter changes.  We do stall off using it with fans around the house.  We have the window unit fans that help keep the house cool, as well as a ceiling fan in the kitchen.  Interestingly, I read that using cups of ice in front of the fans can simulate air conditioning.  Need to try that one this summer.

We looked into programmable thermostats and amazon (as always) has some good choices.  Honeywell has a good reputation, with different choices ranging in price from $24 for a basic programmable model to $140 for a more deluxe touchscreen model.  I’m all for good reviews and middle of the road pricing, so on order is a Honeywell 7 day programmable thermostat.  It claims to be easy to install and many of the reviewers back this up.  If trouble happens, I always have my favorite brother the H-VAC journeyman!

My last energy thought is whether to buy a dishwasher or keep up with the good ole’ fashion hand washing.  I’ve put in my 5 years of dish washing servitude since buying this house and am ready for a change.  Being the environmental mom, I choose to use paper or plastic plates, cups, or utensils VERY SELDOM (like maybe once a year).  I’ve been told by a certain child that if I had a dishwasher, she would help me with the dishes more.  With the way she washes, I’m sure they will be cleaner! So research I did, and I found most sites I browsed pushed for ENERGY STAR dish washers as using less energy, water, and obviously less time. I particularly liked The Huffington Post’s blog on what is better, by hand or dishwasher.  The editor brought up an interesting study done in EatingWell magazine regarding the very subject.    “…washing a load of dishes (12 place settings) by hand uses on average 27 gallons of water and 2.5 kilowatt-hours of energy to heat the water — equivalent to running a hair dryer for two and a half hours.  By comparison, an energy-efficient dishwasher uses about four gallons of water and 1 kWh of energy per load (Ruopp, 2012).”  Well, that decides it…I’ll be appliance shopping soon.  I know two kids that will be very happy!

Chickens and Water

100_1620

It’s almost two months since I’ve become an official “chicken momma” and I’ve learned the following when it comes to water:

  • As babies, they are so cute to watch when they learn to drink from a dish
  • The dish quickly turns into an official waterer when we discover that one can swim in the dish
  • When chicks finally learn to fly up to something, inevitably it is to the top of their waterer…and cleaning OUT the waterer three times per day is just the beginning!
  • If you leave water in a shallow open container, yes someone WILL tip it over
  • When you are trying to teach them to get water from the “nipples” in the new watering system, your legs WILL fall asleep in that crouched position before someone walks over to figure out why you are making a stream of water
  • If you stay in the above position long enough, you will be pecked at…repeatedly

With that said, I finally installed the watering “system” for my chickens.  Summer is just around the corner and I want them to have access to lots of fresh water.  I browsed lots of sites and eventually went with the watering system components bought from Amazon.  To make my waterer, you will need the following:

  • Oasis Fountainhead, On-demand Poultry Waterer (bought from Amazon, it basically is a section of PVC pipe with “nipples” drilled into it
  • Poultry Waterer Bulhead Fitting Assemby (again, from Amazon, this is a spigot assembly to be attached to a bucket
  • a sturdy bucket (cheap “plasticy” ones only crack when you drill into them, something I QUICKLY learned) I got mine from Home Depot
  • a small section of hose (I bought 10 feet in case I needed to change the placement of the waterer
  • Something to suspend the bucket so that gravity can do its thing

The first two items were sold by Coop Queen  and they included diagrams and steps easy enough for my semi-skillful self to follow.

20130515_132341 20130515_132259

The bulkhead fitting had to be fitted into a drilled hole in the bucket.  Determined to do it myself, I started looking for the necessary tools, but had to concede to defeat when I couldn’t locate the correct drill bit size.  Calling in the professional (a.k.a “honey”) he skillfully drilled the hole in bucket #1 and handed it to me to thread in the bulkhead.  I quickly learned that all buckets are not created equal as it cracked across the bottom.  Calling it a night early, I dragged my tired self inside and half wondered why “honey” did not immediately follow.  Twenty minutes and a new Home Depot bucket later (bucket #2), I had a water tight container for my chickens.

It took me a couple of weeks (and a Personal Day) to finally finish installing the waterer.  I wasn’t sure what to do about attaching the bucket to the coop until I browsed some sites and came up with this….

100_1616 100_1617

I rummaged the basement and dug out a couple of shelf brackets (there is something to be said for not throwing away stuff!).  With a couple of small pieces of wood vertically attached to the run, I attached the brackets with screws and placed an old piece of wood  on top.  To keep the bucket from tipping off, I “bungied” (yet, it is a word…at least in my world) it to the wire and filled it up.  The hose runs down through the chicken wire and to the waterer with nipples.

100_1618

Starting off with removing the water container from the run, I hoped that eventually they would notice the new device and inspect it.  After the second trip outside to visit and see the progress, it quickly became clear that I did not have dumb chickens.  One of the Reds strolled herself into the coop, drank from the coop waterer, and strolled herself back out.  Goodbye, coop waterer.  Hello, achy legs.  After 5 full minutes (that is a long time in one position at my not-so-young-anymore age) I finally had one taker.  First trying to dig the water out of the grass clipping below, she realized that she needed to concentrate ABOVE.  Pecking at a nipple, she got what she was looking for.  But then…she walked away.  I can only hope that (a) she remembers what she just did and (b) she spreads the word.

Anyway, the waterer is in place, I can feel my legs again, and if all else fails they can open their beaks and catch rain water.

Happy Wednesday!

The Guest House

photo

Our coop and run took about a month to finish for our new additions.  We used the plans from Purina Mills and created our cute little 4 x 4 coop and added an 8 x 4 attached run.

A good part of what we needed came from reclaimed lumber and leftover supplies from various projects.  Before building, I estimated that the coop, run, and finishing touches would cost about $600.  After scrounging through what we had left over from other projects, acquiring some used materials from relatives and the local used lumber store (Urban Miners), and several trips to Home Depot and Lowe’s, our final tally was about $380.

100_1499100_1508

The floor was built first mostly with reclaimed lumber.

100_1514

This was attached to pressure treated 2 x 4’s (nailed in an “L” shape).

100_1579100_1580

After moving the coop to its permanent home in the backyard, the roof was added, again with some of the reclaimed lumber.

We used only 3/8 inch plywood (should have been ½ inch or more) on the roof and found that it warped after a night’s rain.  To help secure it to the frame, we added “hurricane nails” on each of the corners.

100_1584

Before continuing on, we placed the coop onto four leftover patio bricks set into the ground.

100_1589

For the front, back, and sides we used T-111 siding panels.  We added a plexiglass window to the east side for the chicks to get the morning light.  Not added yet but soon will be interior shades for privacy at night.  My parents replaced their window treatments and have lots of wooden shades headed to the curb.  I’m sure I can cut them down.  Exterior shutters are also a future thought.

20130418_131550

The original plans called for a “drop-down” door in the back for cleaning.  I preferred to have the door swing open to the side.  Changes I would consider for the future would be making the door a little smaller and using some kind of brace on the inside.  The T-111 is starting to warp and does not close perfectly flat.  We also added a second lock on the bottom for extra security.

100_1591100_1595

Roofing paper inherited from my parents was stapled to the plywood and leftover shingles nailed on top of that.

20130418_171723100_1593

I did not like the original design of the external nest box since it did not seem to have a lot of support.  We decided to add some support by nailing in a few braces before adding the front panel on.  Plywood was used on the sides of the nest box and leftover planks for the rest of the box.

100_1596100_1598

Instead of the top opening, I made the front drop down for gathering eggs.

100_1600

Inside, I added a piece of wood to give the box more privacy for the hens.  I also patched up any potential drafts with leftover wood pieces.

100_1602

For easy clean-up, we found the least expensive stick tiles and covered the bottom of the coop and nest box with these.  Gotta look pretty for my girls!!

20130427_194208100_1603

For the run, we started with six landscaping posts, instead of 4×4 lumber (they are half the price).  The top and middle rails consisted of more reclaimed lumber to which we nailed hardware cloth on the bottom half (most of my building wounds came from this!).   After reading other opinions on what to do with the wire, we decided to have it bury about a foot of wire on the outside of the run to prevent any “extra company”!  With the price of the hardware cloth (ouch!) and how much it hurts to work with (double ouch!) we decided to put regular chicken on the top half and across the top.

100_1605

Once buried, we placed 4×4’s across the bottom and screwed them in.

100_1606

My dad being ever-so-handy and full of ideas installed the gate for us.

100_1604100_1610

We gave the chicks a door and ramp for access to the run.

100_1607

The final product is an adorable Ruby Red painted (by my wonderful daughter!) coop with lots of outdoor space next to as well as underneath the coop for our 4 Rhode Island Reds and 2 new additional Silkies.

IMG_0091Photo1557IMG_0087

Grass fed fast food….???

I dropped my ever so handsome son at his job at Big Y this morning and browsed the store to do my shopping.  I promised him I wouldn’t embarrass him (not like I would??) and went on my way.

My ultimate goal is to switch over to more organically grown and local foods over time.  Today’s trip included organic strawberries.  More expensive then their conventional cousins ($1.50) I’ll admit they are more tasty.  Even better are strawberries from Pell’s….so looking forward to June!

In the meat section, I spied Strauss Brand Grass Fed beef patties.  Picking up a package, I also picked up the Big Y brand of patties to do a little comparison taste test.  Both 15 percent fat content and about the same weight, the grass fed patties were only $1.20 more for the package.  Buying this gave me a flashback to one of my graduate classes and a book we were assigned to read.  Michael Pollan’s Omnivore’s Dilemma traced each food source from its origin to the dinner table.  Chapter four in particular touches on cattle and how they are fattened for slaughter.  The grass fed cow takes longer to fatten than the feedlot cow, but ultimately is a healthier meat with better fats.  The feedlot cow, on the other hand, is fed corn to gain weight quick, but their digestive systems aren’t designed to handle this diet.  So in comes antibiotics, hormones, and other food additives.  And out goes a meat with more saturated fats and traces of chemicals.

I finished my shopping but not before harassing my son a little while he bagged my groceries (okay….I couldn’t resist).  I spent the rest of my day building my appetite for my burger taste test (pick up my daughter…paint part of coop….drop off my daughter….work on coop run….pick up my daughter….continue on coop…) before taking a power nap.  My wonderful other half took it upon himself to barbecue our dinner and had lots to insight as he played chef-for-a-day.  I noticed on the grill that the grass fed were a little smaller and he commented that they cooked up quicker than their rival.  On the plate, they looked similar.  We went without ketchup and the like so we could taste each burgers flavor.  I could taste a difference in one over the other.  I found the conventional burger to be a bit more bland than the grass fed.  My partner felt that the grass fed burger had more of a meatier taste, while the other tasted more like fast food with a greasy feel.

The Strauss website explains each of their grass fed meats and the health benefits associated.  Good for you, the cattle, and the earth.  Love their motto, “Nature gives.  We accept.”  Family run business…made in the USA….and healthy.  You’ve got my business.

Next shopping trip…free range chicken….

Spring Cleaning

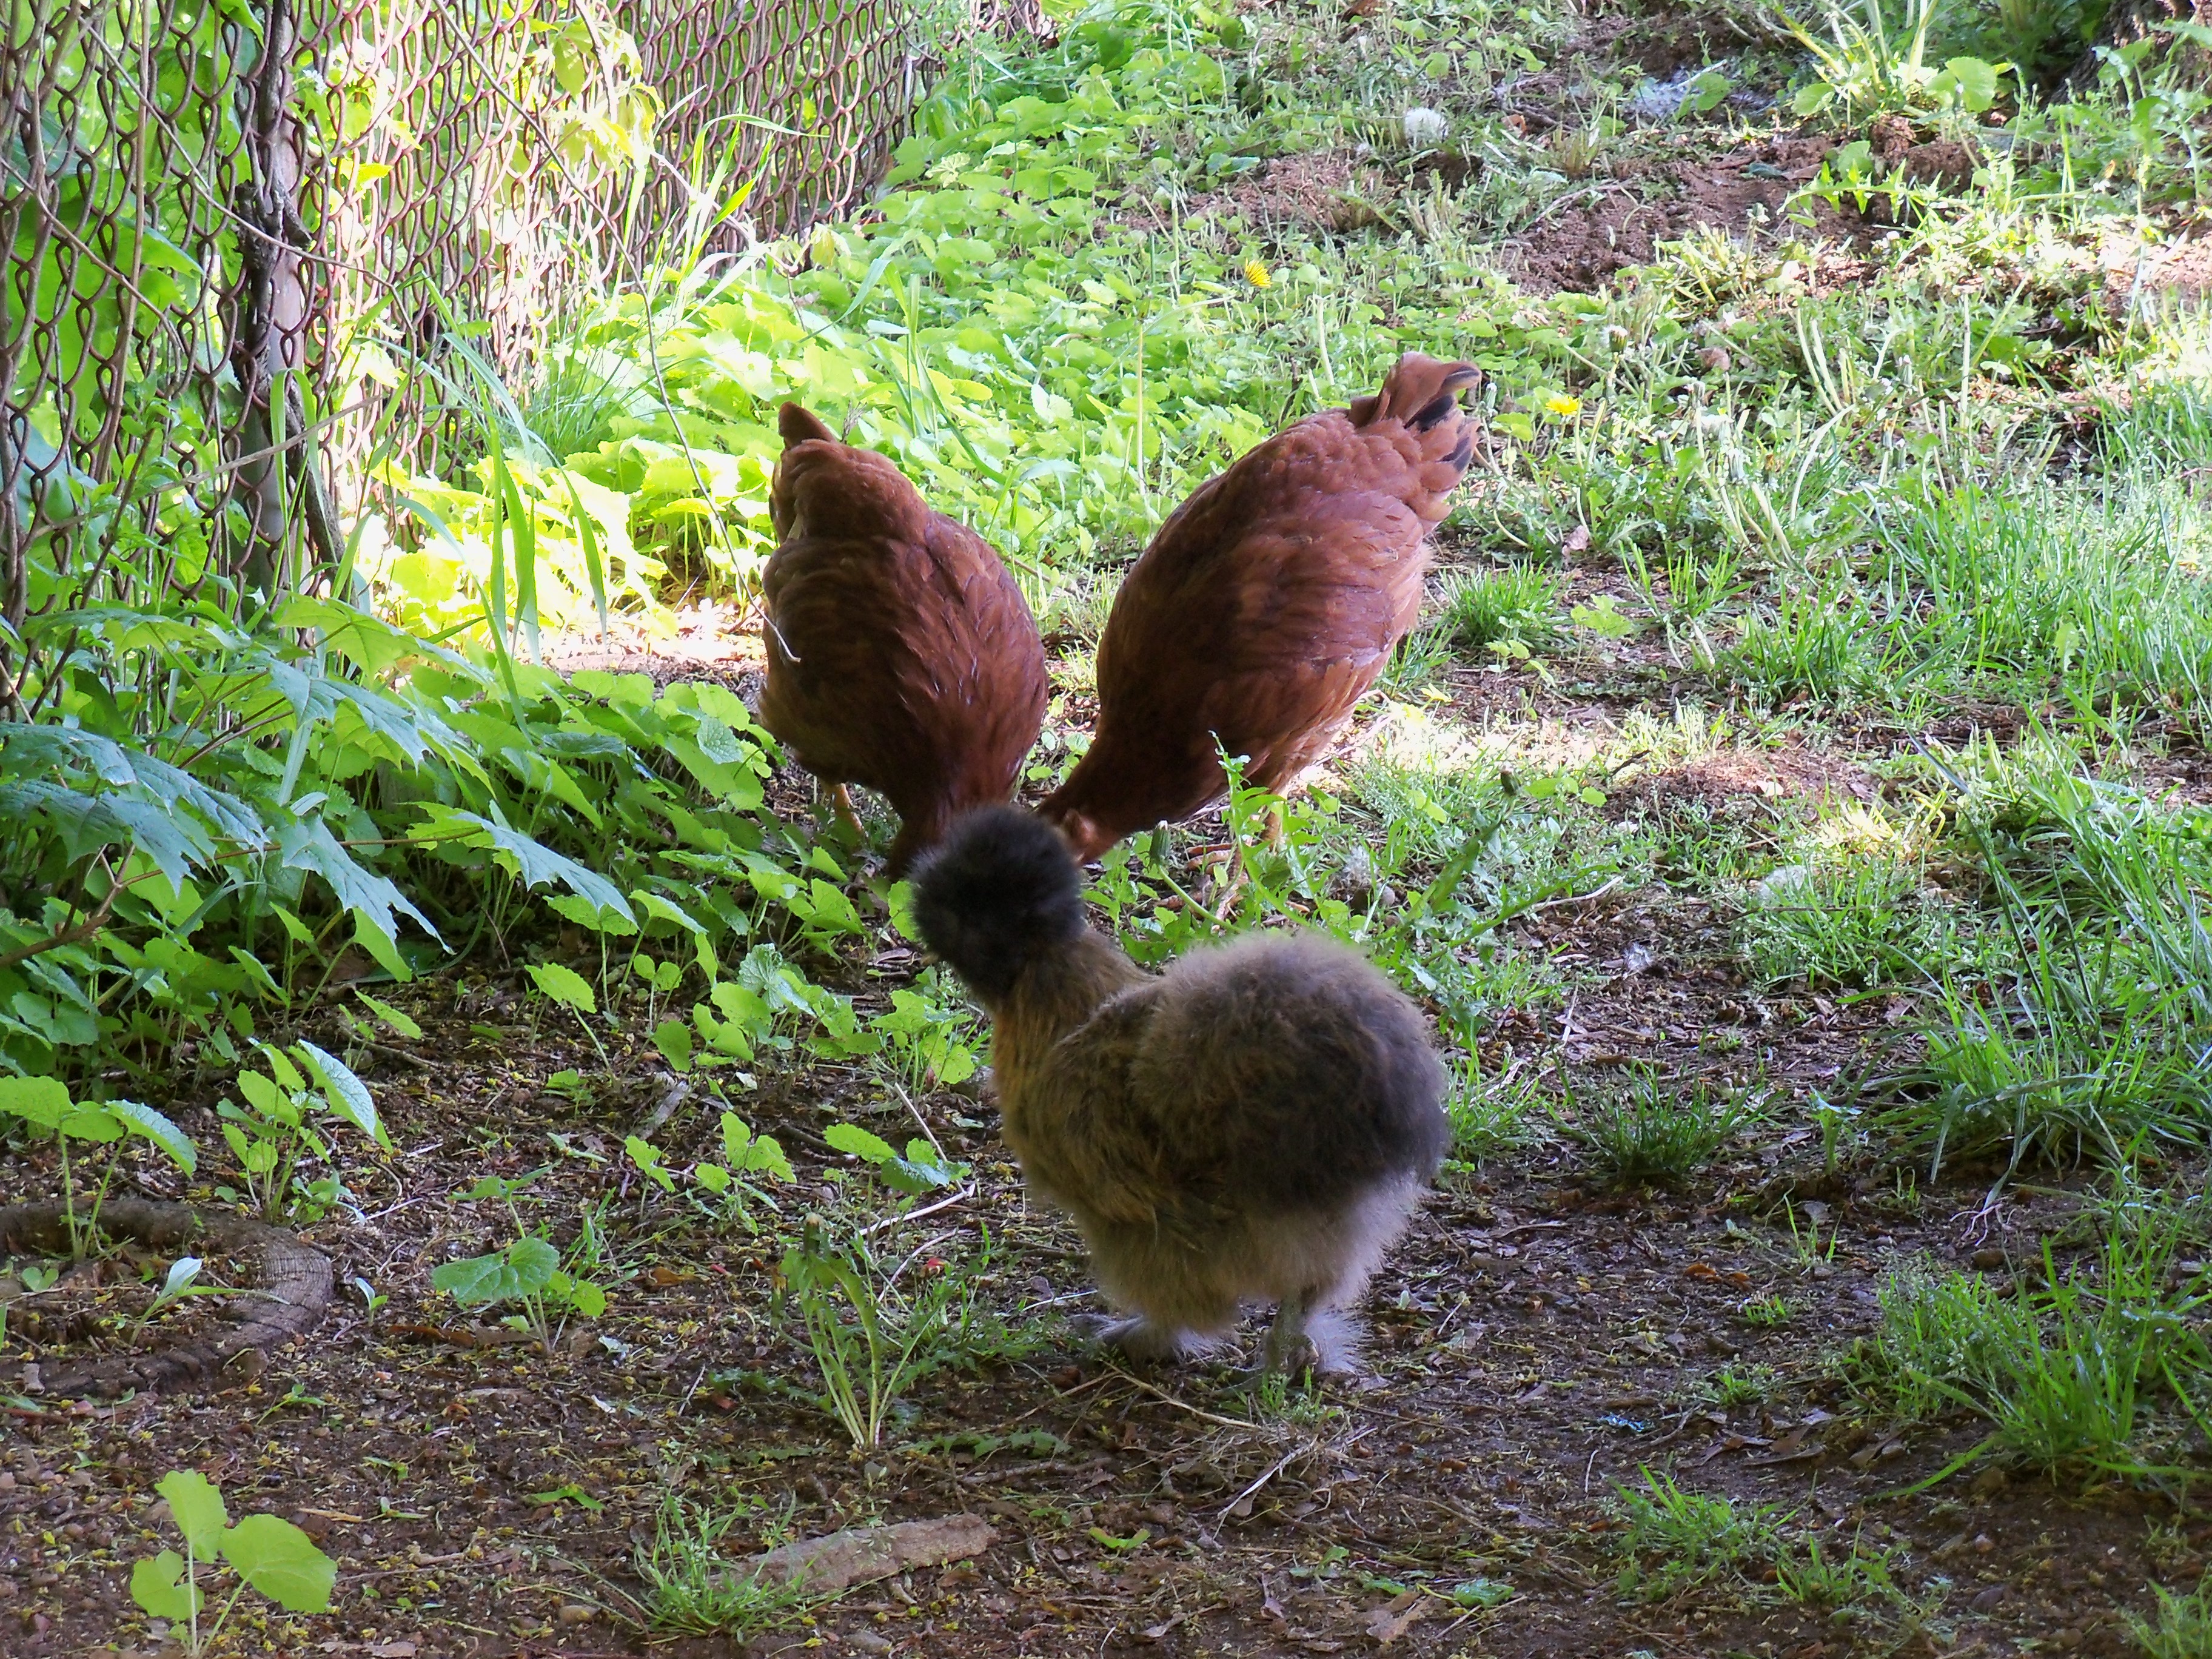
My new family additions are hitting that awkward “teenage” stage….their feathers are coming in, they argue with each other more often, and they make a huge mess.  I was told as they grow their feathers there would be dust everywhere.  I didn’t think much of it…until now!  I guess I just needed to see it to believe.  So the girls were moved from the living room to their temporary home in the basement until their coop is ready.

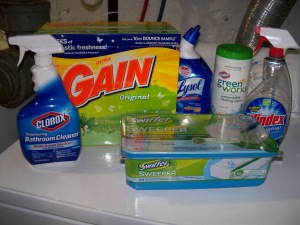
Once moved, I tackled the spring cleaning of the upstairs.  I decided to stick to natural cleaners and started off with lemon oil to clean off the dust and give the room a nice shine.  With its main ingredient being mineral oil, I didn’t feel so bad using it.  Searching through my cabinets to continue my cleaning, what I found was not exactly on my green list.

100_1574

After several Google searches for recipes to try out, I’ve come up with a few that are worth repeating.

Laundry

My first homemade concoction to try out was fabric softener.  I started letting my clothes dry on lines/racks in my basement to save on electricity.  I noticed quickly that I didn’t like the “crunchy” feel of my clothes, especially my towels.  Even letting them hang until almost dry and throwing them into the dryer for 10 minutes still didn’t soften them as I hoped.  Browsing the internet, I came across this wonderful site full of recipes to try.

Her fabric softener is just the basics:

3 cups distilled white vinegar

1/4 cup of rubbing alcohol

15 drops of essential oil

Essential oil was something I’ve never tried, but easy enough to find.  Amazon has a variety of scents to choose from.  I purchased lavender oil for about $5 and plan on trying out other scents (peppermint….lemon….).  After mixing them together, I store them in a labeled mason jar.  Since using, my clothes have felt definitely softer with a nice fresh scent.  And the price is cheaper than store bought.  I can make a batch for under $3, compared to Walmart’s price on Downy Fabric softener of almost $4.

Next up was laundry detergent and who more willing (??) to be my guinea pig than my son (okay…maybe not so willing, but he did need his clothes washed).  There were quite a few sites with homemade recipes, most with similar ingredients so I settled on this recipe with a slight modification.

Laundry detergent

1 cup washing soda

1 cup borax

1 bar castile soap, finely grated

3-5 drops essential oil (I used Dr. Bronner’s Lavender castile soap so I omitted the essential oil)

100_1571

The grating of the soap took a while, but other than that it was easy to mix the ingredients which I stored in a recycled Chinese food container.

100_1572

Two tablespoon fulls into the wash and we’re good to go.  No soap residue, seemingly clean, with a slight lavender scent.

The soap itself was a bit pricey ($5.49 at Big Y) but the other ingredients were under $1 for the amounts I needed.  If I made enough to match Gain 150 loads (Walmart price under $20) I found that my laundry detergent is quite expensive!  I would be spending almost $40 for the same number of loads.  Amazon also carries Castile soap for a lot cheaper ($2.30 for Kirk’s) bringing my homemade detergent to a comparable price of just under $20.  An additional substitute of Ivory soap for Castile soap brings this recipe down to under $10!  Next time, we try Ivory…wonder if I can get my son to test run it again….

In the Kitchen and Bath

Next up was the kitchen where I needed an all purpose cleaner.  In the past I tried the diluted vinegar mixture (1/2 vinegar, 1/2 water) but the smell of vinegar made me feel like I was in a salad bowl.  The essential oil “junky” that I’ve become, adding 10-12 drops into the mixture made a world of difference.  Also stored in a mason jar under the kitchen sink, this extremely inexpensive (25 cents!) cleaner will be used frequently.

I have linoleum on my floors and wanted something to clean well and dry quick.  I went back to naturesnurtureblog.com for this floor cleaner recipe:

1 cup water

1 cup vinegar

1 cup alcohol

2-3 drops dish soap

10-15 drops assorted essential oils (I only had lavendar so I went with it)

I mixed this recipe in (yet another!) recycled Chinese food container, dipped an old wash cloth in, wrung it out and secured it to a Swiffer mop.

100_1568 100_1569

Only issue I have was the essential oils.  I only used lavender since it was all I had and I didn’t smell it as much as I thought.  The original recipe called for lavender, orange, and peppermint…worth trying with these for a second time.  Overall, a nice clean and the alcohol evaporates quickly making the floor dry in no time.  For under $3 (that’s doubling the recipe) it is less expensive than the Swiffer 12 pack of wet wipes ($4.50) in the basement.

Having enough of the floor cleaner and all purpose cleaner for the bathroom, I just needed to whip up something for the toilet bowl.  A 1/2 cup of baking soda, a couple drops of lavender oil, followed by a cup of vinegar cleaned it well.  For under a quarter, I’ve got a clean bowl and I’m not dumping chemicals down the drain.

It’s good to know there are so many resource out there to experiment with when it comes to greener cleaning products.  Not only am I sparing my family from the toxic chemicals in our past cleaners, I am also helping to preserve the environment.  Safer, greener, and saving money too!

Raspberries

100_1548The raspberry canes are starting to bloom.  They’re tucked in the corner of the yard, under a Maple tree, getting lots of sun through the day, but shaded in late afternoon before catching a last glimpse of the evening sun as it sets.  Planted two years ago from my brothers cuttings and spreading in their small area, they’ve provided more berries it seems to the birds than to us.  In an attempt to let them do their natural thing, I haven’t given them the care they deserve and essentially their yield speaks volumes.

Browsing Barnes and Noble, I spied upon Grow Fruit by Alan Buckingham.  I have a lot of planting ambitions this year and the colorful pages and mounds of knowledge will serve useful in the months ahead.  Today’s pursuit was to ready the raspberries for the season.  What I didn’t know was that there are different forms of raspberries:  summer-bearing and fall-bearing.  Both have different needs when it comes to caring for them.

In deciding that my crop proved to be the fall-bearing variety, I set out to see what I needed in regards to pruning.  According to Buckingham, fall-bearing bushes bear their fruit on the current years canes, thus needing to be pruned in the fall, after harvest.  I, of course, did not do this last fall.  I did “clean” them up a bit in October, unknowing that I could have cut them down almost to the ground.  I was going to cheat and cut them now, but seeing the new shoots on them changed my mind.  So I “cleaned” them up of any dead wood and let them be, hoping for the best.  This fall I’ll mow them down.  Interesting, summer-bearing bushes fruit on last year’s canes, so care must be taken when pruning them.  Only the canes that fruited this year must go.

Like everything else, food is important.  I personally like to use anything organic and my fish emulsion fertilizer works well for me.  Mixed in a watering can with water, I lugged the can down to the bushes several times to fertilize my crop.  The aged compost from last year was put to go use and spread around all my plants, with tonight’s prediction of rain a needed additive.

Being a smaller bush, they don’t necessarily need supports as do their summer relatives.

Other than possibly more fertilizer in late spring and more frequent watering when the summer heat dries out their soil, I think I’ll let them be and hope that Mother Nature is good to them.  At least I know they have a better start this year.

100_1550

Coffee, anyone?

100_1528

Good ole cup of Joe.  Love the smell….warm and well, so coffee-like.  I don’t particularly care for the taste of coffee, but I do love the smell.  I could sit in Dunkin Donuts or Starbucks and just inhale the goodness….

But I digress.  Last fall, on a whim, I joined the ranks of Keurig owners and bought my first Keurig coffee maker for the family.  It was easy to program, quick to make a cup of coffee (or tea and hot cocoa), and just fun to work.  My Dad was spending mornings at my house installing a new bathroom and once I showed him how to operate it, he was hooked.  The newness wore off quick and the guilt set in…particularly when I saw how many coffees a week we went through and how many of those cups were being thrown out.  So I set off to find a more environmentally sound coffee for the Keurig and was pleased with what I found.

100_1525We bought the adapter for the Keurig and found that it works well.  Scoop the coffee into the basket, place into the holder, screw lid on and pop into the coffee maker (after removing part of the Keurig where the adapter fits).  You can choose from any of your favorite coffees and it’s a lot cheaper in the long run.  Folgers runs $11.49 for 33 oz. (regular price at Walgreen’s)  With the suggested servings per container of 270, that’s only 4 cents per cup!  Only draw back for my boyfriend is the fact that he gets up a 5 a.m. and is not necessarily coherent enough at that time to deal with the extra steps nor does he want to spend the time at those wee hours of the morning.

100_1517

I searched the internet and found the Green Cup coffee pods and adapter on Amazon.  The adapter is $4.99 (plus shipping) for a set of two.  It can be reused over and over, is dishwasher safe (if only I had one…) and made in the Connecticut (love local buying!).  The coffee pods fold neatly into the adapter and fits into the holder where regular Keurig K-cups fit.  At $9.99 for 18 pods, you’re looking at $0.56 per cup.  Flavors are limited to a few flavors and the closest store for me (Whole Foods) is 20 minutes away.  Another drawback according to the BF is that if you don’t fit the pod into the cup properly, you’ll get a watery cup of coffee.  Overall, I do like the fact that there is no plastic components to the pod and it is totally compostable.  Major plus in my book.

100_1522 I’m finding BJ’s Wholesale Club is going more and more environmentally friendly.  Stopped there today and left with SEVERAL Earth friendly products.  We found these little gems a while back and while not totally plastic free, they have a significant reduced amount of plastic on them and if you’re so inclined you can cut off the bag part for the compost pile (right, honey??).  Made by the Roger Family Company, we purchased the San Francisco Bay brand Rain Forest Blend and as my BF puts it, “Best dang cup of coffee I’ve ever had!”.  Committed to organic coffee growing, we also like them because they have the easy of the K-cups, with less plastic, and a cheaper price tag.  At $29.99 for a box of 80, that’s $0.37 per cup!  Not bad for staying out of the Dunkin Donuts drive through.

For me, I’ll stick with my tea with honey.  And thanks to my Keurig, I can get a cup of hot water in no time.

Chicks!

Babies!

Babies!

Inevitably I knew I would get them.  I had every intention of doing it the right way…planning what types, designing and building the coop, getting what I needed first….

Then Chick Days at Agway happened.  Four Rhode Island Reds later, I’m finally a chick owner.

I needed a brooder quick so I ended up evicting Leo the guinea pig from his cage.  No worries since his new home (the dog’s old crate) is a lot bigger.  Wrapped plastic on the bottom part, a heat lamp from reptiles of the past, and it’s “home, sweet home” …at least for the next month.  The heat lamp is hot, so careful not to have the plastic near it.  According to backyardchicken.com (Thank you Mr. Agway for this resource!)  they need their brooder at 90 degrees to start, which a thermometer placed on the bottom confirmed.  The chicks are happy….not huddling together or trying to escape the heat.

100_1445

Homemade brooder

So in deciding whether to get chickens or not, there were the inevitable pros and cons.

Pros:

  • Fresh eggs (obviously)
  • Bug control when they are older
  • Fertilizer, au naturale (or at the least, another compost ingredient)
  • Entertainment (albeit, temporary) for the cats
  • Scratching in the garden
  • They’re cute and cuddly!

Cons:

  • Another chore
  • Another project (coop building) to fit time in for
  • Attracting of predators
  • My neighbors (see one above)

I think my final con really held me off for a while.  In trying to be the good neighbor, I didn’t want to upset the locals.  Then it occurred to me….after having an outdoor rabbit hutch, a compost pile and tumbler, and (most important) living near water company I’m sure whatever critters living in the area are not there for me.  Ironic, my garden has been fairly free of critter vandalism yet my neighbor (with his garden fence) had several “break-ins” last year!  So the pros win.

Welcome to the neighbor, chicks!